To install Govee permanent outdoor lights, test the lights first, then clean the surface. Mark your path. Stick each light with its adhesive and add screw clips. Join sections with waterproof connectors. Plug into a GFCI outdoor outlet. Then pair the lights in the Govee Home app.
Permanent lights sound like a big project. They are not. Most homeowners finish in two to four hours with basic tools. Want to know how to install Govee permanent outdoor lights without mistakes? Plan first and stick second. This guide shows you how to install Govee permanent outdoor lights step by step. You will check your model first. Then you will avoid the common errors and set up the app. No electrician is needed for most homes. You just need a ladder, a free afternoon, and a clear plan. Let’s get your roofline ready.
First, Check Your Govee Model
Govee sells several permanent light families. They look alike, but a few rules differ. Find your model number on the box or in the app.
H705A/B/C (RGBIC): Cannot be cut. Up to 150 ft total with extensions.
H705D/E/F (Gen 2 / Elite): Cannot be cut. Up to 150 ft total.
H706A/B/C (Pro): Can be cut and spliced. Up to 200 ft total.
H707A/B/C (Prism): Can be cut and spliced. Up to 200 ft total.
Measure your roofline before you start. A model that cannot be cut must fit your space as sold. Also, do not mix lights from different models in one run.
What You Need Before You Begin
Your Govee kit, with clips, screws, and connectors
Ladder, drill, tape measure, and pencil
Painter’s tape to mark spots
Rubbing alcohol and a clean cloth
An outdoor GFCI outlet near your starting point
A helper to hold the ladder
Pick a dry, mild day. Adhesive bonds poorly in cold or wet weather.
How to Install Govee Permanent Outdoor Lights, Step by Step
Test the lights on the ground. Connect the strings and plug them in. Make sure every light works before you climb. This saves you a long ladder trip later.
Plan your path and power. Start where the power will enter. Work outward from there. Mark clip spots with painter’s tape. Check that your total length stays under your model’s limit.
Clean the surface. Wipe each spot with a cloth and rubbing alcohol. Let it dry. Dirt and dust are the top reasons adhesive fails.
Set your distance from the wall. Govee advises 3 to 8 cm (about 1 to 3 inches). Many people pick 5 to 10 cm. Choose one distance and keep it the same all the way.
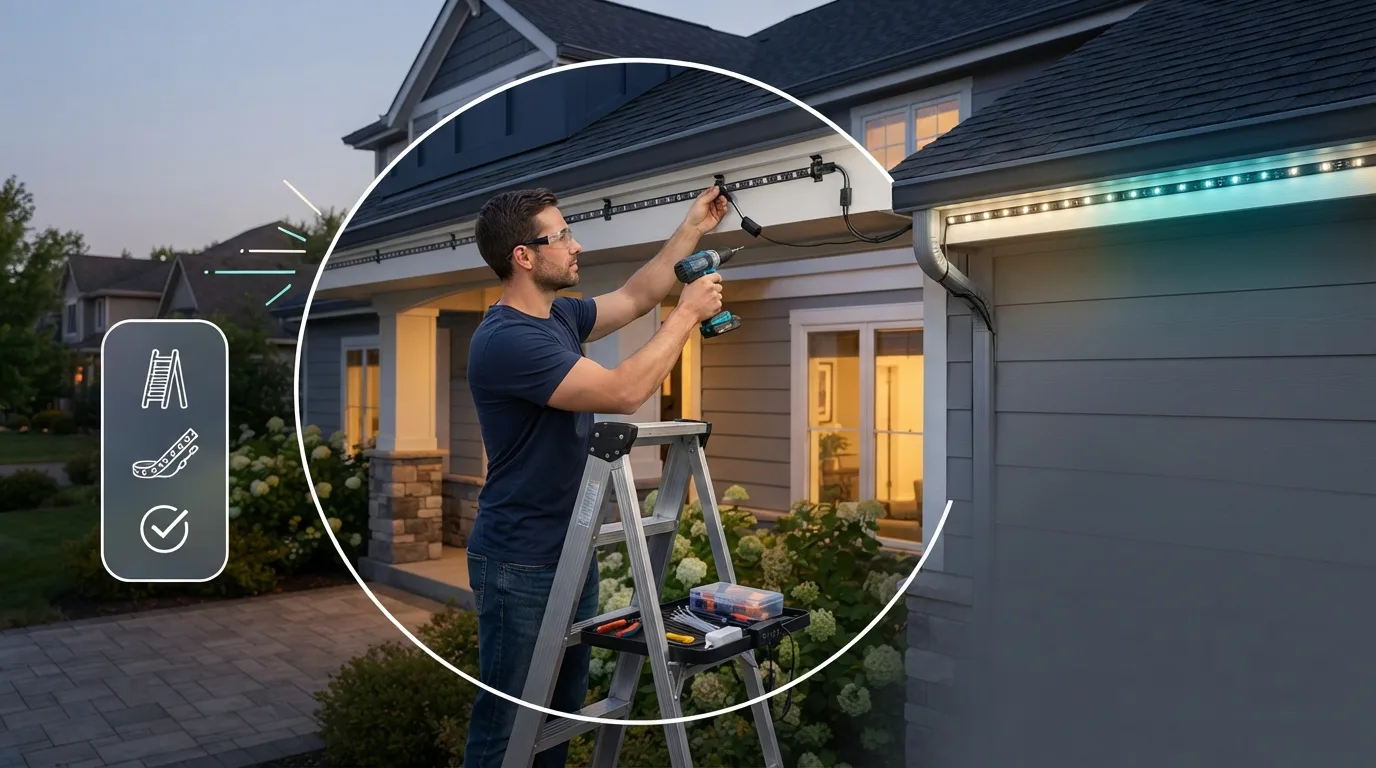
Stick each light in place. Peel the VHB adhesive backing. Press the light on the surface. Hold it firmly for at least five seconds.
Add the screw clips. Govee advises four screw clips for each string light. Adhesive alone can slip in heat and wind. Clips keep the line straight for years.
Join the strings. Link sections with the waterproof connectors. Screw each cap on tight. Then screw the cap onto the last string’s end. A loose cap lets water in.
Add the driver module on long runs. Using the 200 ft Pro kit (H706C) with 12 strings? Place the LED driver module after the fifth string. Then connect the other seven.
Plug in and check. Connect to the controller. Plug the power adapter into a GFCI outdoor outlet. Confirm every light turns on.
How to Handle Corners and Tricky Spots
Corners
Never bend the line sharply. Sharp bends can damage the wiring. Make a gentle curve, or use the connectors to turn the corner.
Gutters and downspouts
Leave about 1 to 2 inches of clearance from moving parts. Clip the line every 12 to 18 inches so it does not sag.
Rough or uneven surfaces
Brick, stucco, and old wood can weaken adhesive. Rely on the screw clips there. Drill pilot holes so wood does not split.
How to Set Up the Govee Home App
Download the Govee Home app. It works on iOS and Android.
Turn on Bluetooth. Tap the plus sign and choose your light model.
Connect to Wi-Fi. Use a 2.4 GHz network. The lights do not work with 5 GHz.
Set scenes and schedules. Pick a preset. Then set lights to turn on at sunset and off at sunrise.
Keep your router within about 30 feet of the control box. Thick walls and metal siding weaken the signal. A Wi-Fi extender can help.
Safety Tips Before You Climb
Unplug the lights before you touch any connector.
Have someone hold the ladder.
Use only outdoor-rated outlets and extension cords.
Splice only on models that allow it, and follow Govee’s steps.
Call a licensed electrician if you need new wiring or outlets.
Check local rules too. If you live in an HOA, ask about permanent lights first.
Common Problems and Fixes
Some lights do not turn on
Check every connector. Make sure each one is tight and capped. One loose joint can break the whole line.
The app will not connect
Turn Bluetooth on during pairing. Update the app. Move closer to the control box.
Wi-Fi will not connect
Confirm you use a 2.4 GHz network. Restart your router. If the signal is weak, add an extender.
The adhesive lets go
Clean the spot with alcohol. Use fresh adhesive. Add screw clips as backup.
You need to reset the lights
Hold the button on the control box for about 10 seconds. Wait for the lights to flash.
People Also Ask
How long does it take to install Govee permanent outdoor lights?
Most homes take two to four hours. Planning and testing first makes the job faster.
Can you cut Govee permanent outdoor lights?
Only some models. Pro (H706) and Prism (H707) can be cut and spliced. H705 series lights cannot.
How far from the wall should Govee lights sit?
Govee advises 3 to 8 cm. Many people choose 5 to 10 cm for a clean glow. Keep the distance even.
Do Govee permanent outdoor lights need Wi-Fi?
Yes, for schedules, scenes, and voice control. You need a 2.4 GHz network. The lights do not support 5 GHz.
How many feet of Govee lights can you connect?
Up to 150 ft on H705 models. Up to 200 ft on Pro and Prism models. Do not go over your model’s limit.
Conclusion
You do not need a pro crew to light your home. You need a plan, a clean surface, and a little patience. Test first. Measure twice. Add the screw clips for backup. Stay steady on the ladder and take it one section at a time. Then step back and look up with pride. Your roofline glows, and you built it all yourself. That feeling is worth every minute. Your home will look great every night of the year, in any season.

I am Eryndor Vale, a seasoned content writer who brings depth, clarity, and creativity to every piece of writing.
I specialize in crafting engaging, well-researched content that connects with readers and delivers real value.
Through my work at textzhub.com, I turn ideas into impactful stories that inform, inspire, and engage.