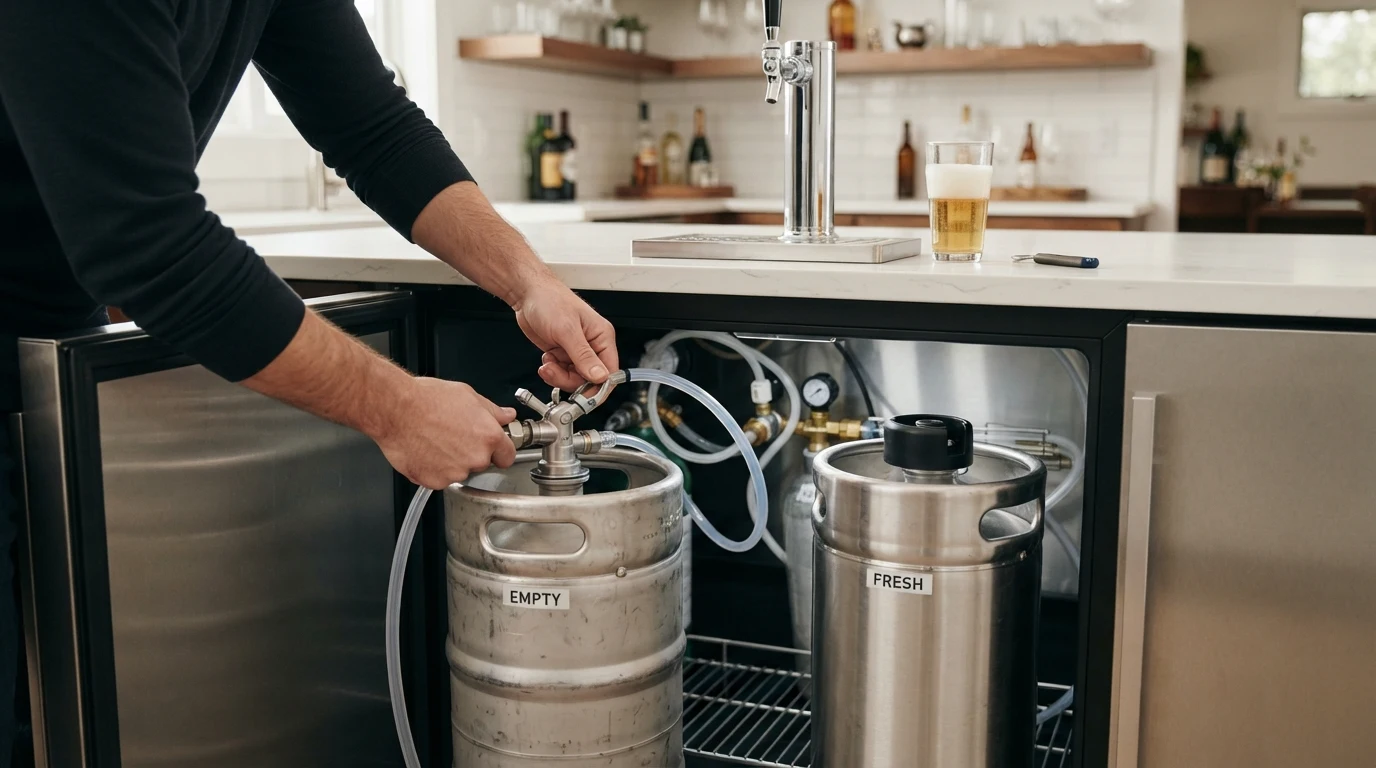
To change a keg, shut off the CO2, release the pressure, disconnect the coupler, swap in the new keg, lock the coupler back on, then reopen the gas. Most people finish in 5 to 10 minutes once they know their coupler type.
Time needed: 5 to 10 minutes
Tools you’ll need: Gloves, a clean towel, and a keg wrench (only if your coupler needs one)
Before you touch anything: Always release pressure first. Skipping this step is the number one reason people get sprayed with beer.
Every keg coupler works a little differently, so before you dive in, it helps to know which one you’re dealing with. That’s exactly what we cover next.
There’s a specific kind of panic that hits when the beer stops flowing mid-party. Nine times out of ten, it’s not a broken kegerator. It’s just an empty keg. Learning how to change a keg sounds intimidating the first time, especially with all the talk of coupler types, CO2 pressure, and gas lines. But once you’ve done it correctly, it’s a five-minute job you’ll never dread again.
This guide walks you through everything: identifying your coupler type, changing a keg at home versus in a commercial bar, the safety steps most guides skip, and what to do if your beer comes out as foam after the swap.
Whether you’re running a home kegerator for game day or managing a draft system behind the bar, you’ll find the exact steps for your setup below. No guesswork, no beer shower.
Before You Start: Pre-Flight Checklist
Rushing into a keg change without checking a few basics is how people end up covered in beer or, worse, connect the wrong keg to their line. Run through this quick checklist first.
Confirm the keg is actually empty. Check your CO2 gauge. If pressure has dropped to zero, that’s your first clue. Not sure? Open the tap briefly and listen. A steady pour means there’s still beer left. A hissing, gurgling sound means you’re running on fumes.
Gather your tools.
Clean gloves
A towel (for spills, always)
A keg wrench, if your coupler type requires one
A spare O-ring, in case the old one looks worn
Clear your workspace. Kegs are heavy and awkward to maneuver. Give yourself enough room around the kegerator or cooler to lift, twist, and set the empty keg down without knocking anything over.
Double-check the new keg. Confirm it’s the right beer style and the correct keg size for your system. It sounds obvious, but swapping in the wrong keg is a surprisingly common and expensive mistake.
Once you’ve checked these four boxes, you’re ready to move on. Next, figure out which coupler type you’re working with, since that decides how the rest of the process goes.
Know Your Coupler Type First
Not all kegs connect the same way, and using the wrong technique on the wrong coupler is where most beginners go wrong. Here’s a quick breakdown of the main types you’ll run into.
Sankey (D-type). The most common coupler in the US, used by most domestic and craft breweries. It twists onto the keg valve about a quarter turn clockwise.
Euro Sankey (S-type). Similar to the D-type but built for European imports like Heineken, Beck’s, and Amstel. It also twists on, but the valve is different, so a D-type coupler won’t fit.
U-type. Used for select UK and Irish beers, most notably Guinness and Harp.
A-type (German slider). Used with many German beers such as Warsteiner and Paulaner. It slides over the keg stem instead of twisting on.
G-type. Used with some UK brands, such as Bass and Boddingtons. It’s rare in home setups, but worth knowing if you manage a bar with a varied import selection.
How to identify yours in seconds
Check the keg brand and country of origin. US kegs are almost always Sankey.
Look at the valve on top of the keg.
If your current coupler doesn’t lock in smoothly or feels loose, you likely have a mismatch.
Getting this right before you start saves you from the most common (and messiest) mistake in the whole process: forcing the wrong coupler onto the keg.
How to Change a Keg in a Home Kegerator
Once you know your coupler type, changing a keg at home is a straightforward eight-step process. Work through it in order. Skipping steps is how people end up sprayed with beer.
Shut off the CO2. Turn the valve on your CO2 tank clockwise until it’s fully closed.
Release residual pressure. Pull up on the coupler handle slightly to vent leftover pressure. You’ll hear a hiss. That’s normal.
Disconnect the coupler. Twist it counterclockwise a quarter turn and lift it off (Sankey and Euro types). A-type slider couplers simply slide off the keg.
Remove the empty keg. Lift with your knees, not your back. Even an empty keg takes care to maneuver out of tight kegerator spaces.
Position the new keg. Slide it into place, keeping it upright and centered under the coupler.
Reattach the coupler and confirm the lock. Set it on the valve, twist clockwise a quarter turn until it locks, then pull the handle out and press it down to tap the keg. Give the coupler a gentle tug to confirm it’s secure before letting go.
Reconnect the CO2 and set the PSI. Open the CO2 valve slowly and set the pressure to match your beer style. Lagers and ales typically differ slightly.
Purge the line and pour a test pint. The first pour will likely be foam. That’s expected. Let it settle, then pour again.
How to Change a Keg in a Bar or Commercial System
Commercial draft systems share the same basic principles as a home kegerator, but the scale and setup change a few key details.
How it’s different from home. Bars often run multi-keg manifolds, long-draw lines that stretch from a walk-in cooler to the taps out front, and higher-volume CO2 or nitrogen systems. That means more line length to account for and, sometimes, multiple kegs feeding a single tap.
Step-by-step for commercial setups
Shut off the gas supply at the manifold, not just the single keg line.
Release pressure from the specific line you’re working on. Don’t vent the whole manifold unnecessarily.
Disconnect the coupler. Commercial systems often use the same Sankey or Euro types, just scaled up.
Remove the empty keg from the walk-in cooler using a hand truck. These kegs are heavier and the space is tighter.
Roll in the new keg, connect the coupler, and confirm the lock.
Reopen the gas at the manifold, then the individual line.
Purge and test-pour at the tap, not just at the keg.
Line cleaning frequency in high-volume settings. Because commercial systems pour far more beer, lines should be cleaned every two weeks at minimum, and more often for high-traffic bars. Skipping this is the top cause of off-flavors in draft beer.
DIY vs. calling a professional. Swapping a keg is safe to DIY. But if you’re dealing with line damage, persistent leaks, or manifold issues, industry guidance recommends bringing in a draft system technician rather than troubleshooting blind.
Safety First: What to Know Before You Disconnect
Changing a keg is simple, but skipping the safety basics is how people get hurt or, at minimum, soaked. A few minutes of caution goes a long way.
CO2 ventilation matters. CO2 is heavier than air, so it can quietly build up in enclosed spaces like walk-in coolers or small closets housing a kegerator. In poorly ventilated areas, it can displace oxygen. Always change kegs in a space with airflow, and never linger in a small, sealed cooler longer than necessary.
Release pressure the right way. Never disconnect a coupler while the line is still pressurized. Vent it first, slowly, and stand slightly to the side, not directly in front of the connection point.
Protect your eyes and hands. Gloves prevent slips and cuts from coupler edges. If you’re working with an unfamiliar or older system, safety glasses aren’t overkill. Pressurized beer lines can spray farther than you’d expect.
Lift with care. A full half-barrel keg weighs around 160 pounds, and even smaller kegs are heavy. Bend at the knees, keep the keg close to your body, and never twist while lifting. If it’s awkward to handle alone, ask for help or use a hand truck.
If you smell gas or hear a hiss that won’t stop. Stop immediately, close the CO2 valve fully, and check all connections before continuing. A persistent leak means something isn’t seated correctly. Don’t force it.
Troubleshooting After the Swap
Even with every step done right, draft systems can act up. Here’s how to fix the most common issues fast.
Beer won’t flow at all
Check that the CO2 valve is fully open and the coupler is locked in. A partial lock can block flow entirely. Also confirm the keg has pressure. A gauge reading of zero means it needs gas before anything will pour.
Getting foam only
This is almost always one of three culprits: PSI set too high, beer served too warm, or beer lines too short for your setup. Start by lowering the pressure slightly and giving the new keg time to fully chill. A warm keg foams no matter what you do.
Coupler won’t lock into place
This usually means misalignment. Pull the coupler off completely, check that it’s seated straight on the keg valve, and try again. Forcing it at an angle is what causes the “won’t click” problem.
Gas leaking at the connection
Apply a little soapy water to the connection point. Bubbles mean a leak. Tighten the fitting gently, and if it persists, check the O-ring for wear and swap it out.
Beer tastes off after a new keg
This is rarely the keg’s fault. It’s almost always a sign your lines need cleaning. If it’s been more than two weeks since your last line clean, that’s your answer.
How Long Does a Keg Last Once Tapped?
Once a keg is tapped and kept under CO2 pressure and refrigeration, its freshness is mostly set by the brewery’s freshness date, which is usually printed on the keg cap or side. Even so, it doesn’t last forever.
Typical shelf life with CO2
Pasteurized kegs (most major domestic brands): Generally about 90 to 120 days from the fill date.
Unpasteurized or craft kegs: A shorter window, typically about 45 to 60 days from the fill date, since they lack the process that extends shelf life.
Party pumps: These push air instead of CO2, and beer stays fresh for only about 8 to 12 hours.
Storage temperature matters more than people think
Keep tapped kegs at a consistent 36 to 38°F. Temperature swings speed up flavor breakdown and increase the odds of foamy pours, even mid-keg.
Signs a tapped keg has gone bad
A sour, off, or cardboard-like taste that wasn’t there before
Flat beer despite correct PSI settings
Cloudiness in a beer that’s normally clear
A noticeable drop in carbonation over just a few days
Can you leave a keg half-used and reconnect it later?
Yes, as long as it stays under CO2 pressure and refrigerated the entire time. The problem isn’t pausing use. It’s letting the keg sit disconnected, unpressurized, or at room temperature, which lets oxygen in and speeds up spoilage. If you switch between multiple kegs regularly, label them with the tap date so you’re not guessing later.
How Often Should You Change or Service Your Draft System?
Changing the keg is only half the maintenance picture. Your draft lines need attention too, and mixing up the two schedules is a common mistake.
Keg changes vs. line cleaning
Keg swaps happen whenever the keg runs empty. That could be days or months, depending on how much you pour.
Line cleaning should happen on a fixed schedule, whether or not your current keg is full, because residue builds up inside the lines either way.
Recommended cleaning frequency
Home kegerators: Every 3 to 6 months, or sooner if you notice any change in taste.
Bars and commercial systems: Every 2 weeks at minimum, per standard draft-industry guidance, because of higher pour volume.
Signs your coupler needs cleaning or sanitizing
Beer tastes slightly sour or “off” even from a fresh keg
Visible buildup or residue around the coupler body or fittings
Foam issues that persist even after checking PSI and temperature
It’s been more than a few months since your last full line clean
A simple rule of thumb. If you wouldn’t pour a beer through it and expect it to taste right, it’s time to clean it. Neglecting this step is one of the fastest ways to make a perfectly good keg taste bad. No swap can fix a dirty line.
People Also Ask
How do I know my keg is empty?
Check your CO2 gauge first. A reading near zero is a strong sign. You can also open the tap briefly and listen: a steady pour means beer’s left, while a hissing or gurgling sound means you’re nearly out.
What’s the difference between a Sankey and Euro coupler?
A Sankey (D-type) coupler is the standard for most US domestic and craft kegs. A Euro Sankey (S-type) coupler is built for European imports like Heineken and Beck’s. Both twist on, but the keg valves are different, so the wrong coupler won’t fit.
Why is my beer all foam after changing the keg?
This almost always comes down to PSI set too high, a keg that hasn’t fully chilled yet, or beer lines that are too short for your setup. Lower the pressure slightly and give the new keg time to cool before pouring again.
Can I change a keg by myself?
Yes. It’s a safe one-person job for most home and commercial setups. The main thing to watch is lifting technique, since full kegs are heavy. If it feels too awkward to manage alone, a hand truck or a second set of hands makes it much easier.
How long can a keg sit in a kegerator before it goes bad?
On CO2 and kept cold, pasteurized kegs typically stay fresh for about 90 to 120 days from the fill date. Unpasteurized or craft kegs have a shorter window, usually about 45 to 60 days. Check the freshness date on the keg.
Conclusion
Changing a keg isn’t complicated once you know your coupler type and follow the steps in order: shut off the gas, release pressure, swap the keg, lock it, reconnect. The real difference between a clean swap and a beer-soaked mess usually comes down to skipping one small step, not lacking skill.
Keep this guide bookmarked for your next keg change, whether you’re running a home kegerator for game day or managing a full draft system behind the bar. Get the basics right, stay on top of line cleaning, and you’ll pour a better, cleaner pint every single time.

I am Arden Klyne, a California-based writer who turns complex ideas into simple, compelling stories.
My work blends creativity with strategy, helping content feel both engaging and purposeful.
Visit textzhub.com to explore my latest writing and unique perspectives.