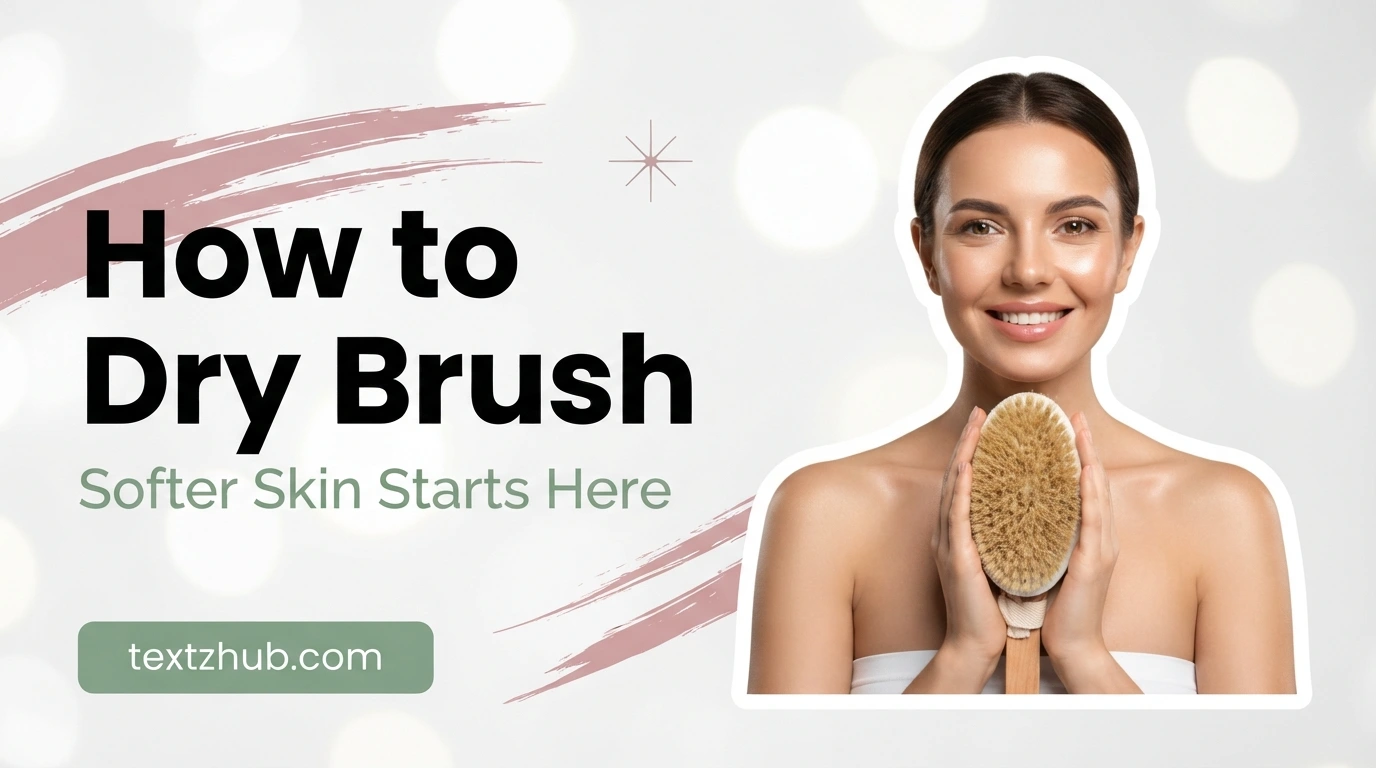
How to Dry Brush Your Body?
To dry brush your body, use a natural bristle brush on dry skin before your shower. Start at your feet. Brush upward toward your heart with light to medium pressure. Use long strokes on your limbs and small circles on your stomach. Spend about five minutes. Then rinse and moisturize.
The 60-Second Version
Read these six steps once, and you can start today. 🌿
● Start with dry skin. Grab a natural bristle brush. Do this before you shower.
● Begin at your feet. Brush your soles and ankles first.
● Sweep upward. Use long strokes up your legs, toward your heart.
● Circle your stomach. Move clockwise. Use lighter pressure here.
● Brush your arms and back. Always move toward your heart. Use a long handle for your back.
● Rinse and moisturize. Shower off loose dead skin cells. Then apply lotion or oil to damp skin.
We break every step down later in this guide. You will get a full body map, a timed routine, and a beginner plan.
☑ Key Takeaways
🌿 Dry Brushing at a Glance
✔ Frequency: Start with 1–2 times a week. Build to 2–4 times if your skin feels calm.
✔ Pressure: Keep it light to medium. Your skin may look slightly pink, but it should never feel sore.
✔ Direction: Always brush toward your heart. Use gentle circles on your stomach.
✔ Safety: Skip broken, sunburned, or irritated skin. Stop right away if it stings.
⬛⬛⬛⬛⬛⬛⬛⬛⬛
🌿 What Is Dry Brushing?
Dry brushing is a simple skin care habit. You glide a dry, stiff-bristled brush over dry skin, right before your shower.
Think of it as gentle body exfoliation. The bristles lift away dead skin cells from the surface. Your skin can feel smoother and softer afterward.
📜 Where Does Dry Brushing Come From?
Dry brushing is not a new trend. Ayurveda, the traditional medicine system of India, calls it gharshana. People have practiced it for centuries. Today, most people use a natural bristle brush at home. The basic idea has not changed.
✨ What Does Dry Brushing Do to Your Skin?
Two things happen when you brush:
● Surface exfoliation. The bristles sweep away flaky, dull skin cells.
● Skin stimulation. The strokes wake up your skin. It may turn slightly pink for a short time. That flush fades fast.
Smoother skin also takes lotion or body oil more easily. That makes your moisturizer feel more effective.
🚫 What Dry Brushing Is Not
Dry brushing is not a medical treatment. It will not cure illness. It will not “flush out toxins.” It will not replace care from your doctor.
We look at the bigger claims in the next section. Some hold up. Others do not. You deserve a clear answer, so we keep it honest.
For now, think of dry brushing as a low-cost self-care step. It feels good when you keep it gentle. It is easy to learn. You can start with just five minutes.
⬛⬛⬛⬛⬛⬛⬛⬛⬛
🔬 What Dry Brushing Does (and Doesn’t Do)
Some dry brushing benefits hold up. Others do not. Here is the honest scorecard.
| Claim | What the evidence says | Our verdict |
| ✨ Exfoliation | Bristles sweep away dead skin cells. | Reasonable |
| 🔥 Circulation | Skin may flush pink for a short time. | Short-term |
| 💧 Lymphatic drainage | Little direct research supports it. | Unproven |
| 🧪 Detox | No solid proof that brushing removes toxins. | Not supported |
| 🍊 Cellulite | No scientific proof it reduces cellulite. | No evidence |
| 😌 Relaxation | Many people find it calming. | Personal |
🤔 Why Do Experts Disagree?
Some sites repeat old Ayurvedic claims. Others stick to clinical research. Dermatologists back exfoliation. They ask for more proof on the rest.
Cleveland Clinic says the cellulite claim lacks scientific support. Its dermatologist says any change is likely a temporary plumping from extra blood flow. ESPA adds that dry brushing is not a medical drainage treatment.
Healthline agrees the science is thin. It also says harm is unlikely for most people.
🎯 What Can You Realistically Expect?
Right after brushing, your skin feels softer. It may look slightly brighter. Over a few weeks, regular brushing plus moisturizer can keep rough patches in check.
Do not expect body shape changes. Do not expect weight loss. Brushing works on the skin’s surface only.
✅ Our Take
Use dry brushing for smoother skin. Enjoy the wake-up feeling. Skip the big promises. If a page promises to “detox” your body, be skeptical. You get a low-cost, low-risk habit with real, modest perks.
Next, we’ll help you pick the right brush.
⬛⬛⬛⬛⬛⬛⬛⬛⬛
🧰 What You Need Before You Start
You need very little to start dry brushing. The best dry brush is natural, comfortable, and easy to hold. 🌿
🖌️ Pick Your Brush
| Brush type | Best for | Keep in mind |
| Boar bristle | Firm, classic exfoliation | Not vegan |
| Sisal or plant fiber | A vegan, eco-friendly option | Can feel coarse |
| Cactus fiber | Medium-firm, plant-based | Check the firmness |
| Soft natural bristle | Beginners and sensitive skin | Exfoliates less |
Choose natural bristles. Skip plastic ones.
🤏 The Firmness Test
Press the bristles against your inner wrist. They should feel firm but never scratchy. If they sting, choose a softer brush.
🖐️ Handle Matters
A long handle reaches your back. A hand strap gives you control on your arms and legs.
Have very sensitive skin? Try a plain, dry washcloth first. It makes a gentler start.
🧴 Optional Extras
⟢ Body oil or lotion
⟢ A clean towel
⟢ A timer for your five minutes
🧼 Keep Your Brush Clean
A dirty brush can cause skin problems, including folliculitis. Care for it well:
◆ Rinse it after each use.
◆ Wash it weekly with mild soap and water.
◆ Air-dry it in an open spot.
◆ Never share it.
◆ Replace it about every three months.
◆ Now, let’s make sure your skin is ready.
⬛⬛⬛⬛⬛⬛⬛⬛⬛
✅ Before You Brush: The Safety Check
Dry brushing is gentle for most people. Brushing too hard can harm your skin barrier, so a quick check keeps you safe. 🌿
👀 Try the 30-Second Skin Scan
Check your skin in good light before your first session. Look for new spots, changes, or irritation. Notice anything odd? See a dermatologist before you start.
🟢 Green Light: You Can Brush If…
🟢 Your skin is intact and calm.
🟢 You see no redness, stinging, or swelling.
🟢 You feel comfortable and relaxed.
🔴 Skip These Spots
Never brush over:
🔴 Cuts, scrapes, sores, or open wounds
🔴 Sunburn
🔴 Rashes or infected skin
🔴 Moles, warts, or raised bumps
🔴 Eczema or psoriasis patches
🔴 Poison ivy or poison oak
🩺 Talk to a Doctor First If…
◈ You have eczema, psoriasis, or another skin condition.
◈ You are pregnant.
◈ You have a circulation or lymph condition.
◈ You have ever had skin cancer.
◈ You feel unsure about a spot on your skin.
Skin can turn extra sensitive with hormone changes. Pregnancy and menopause are two examples. Brush less often then.
🛑 Stop Right Away If…
● Your skin turns very red.
● It stings, swells, or burns.
● You see scratches or bleeding.
● Stinging means too much. Rinse, moisturize, and rest your skin.
🙅 Keep It Off Your Face
Facial skin is thinner and more delicate. A body brush is too rough. Use gentle products made for the face instead.
When in doubt, skip the spot and ask your doctor.
⬛⬛⬛⬛⬛⬛⬛⬛⬛
🗺️ The Body Map: How to Dry Brush Every Zone
Follow this map from your feet to your neck. Use the same path every time. It soon feels automatic. 🌿
| Zone | Direction | Pressure (1–10) | Strokes | Skip |
| 🦶 Feet and soles | Toward the ankles | 5–6 | 3–5 | Cracks, cuts |
| 🦵 Legs | Upward, ankle to thigh | 4–5 | 3–5 per section | Shaving nicks, moles |
| 🍑 Hips and buttocks | Upward, toward lower back | 4 | 3–5 | Rashes, breakouts |
| 🌀 Stomach | Clockwise circles | 2–3 | 3–5 | Any tender spot |
| 🔙 Back | Upward, toward spine and shoulders | 3–4 | 3–5 | Moles, sunburn |
| 💗 Chest and neck | Down toward the heart | 1–2 | 2–3 | Face |
| 💪 Arms and underarms | Toward the armpit | 3–4 | 3–5 | Sunburn, rashes |
❤️ Why “Toward the Heart”?
It is the standard path in dry brushing. It keeps your route simple and consistent. Research has not shown that direction changes results. So relax. Consistency matters more than perfection.
📝 Zone Tips
🔸Soles: Thicker skin handles firmer pressure.
🔸Legs: Use long, fluid strokes. Add gentle circles behind the knees.
🔸Hips and buttocks: Treat them as an extension of your thighs.
🔸Stomach: Move clockwise. Keep it light.
🔸Back: Use a long handle. Sweep upward.
🔸Chest and neck: Use feather-light strokes. Stop at your jaw.
🔸Arms: Start at your hands. Brush toward your armpit.
Aim for three to five overlapping strokes per area. More is not better. We explain the 1–10 pressure scale fully in the pressure section below.
⬛⬛⬛⬛⬛⬛⬛⬛⬛
🪜 Step-by-Step: Your 5-Minute Dry Brushing Routine
Grab a timer. This routine follows the body map from the last section. Use slow, gentle strokes. These times are not for scrubbing. 🌿
🧘 Set Up
Stand on a bath mat in a warm, calm space. Make sure your skin is fully dry. Brush before you shower.
⏱️ The Routine
➡️ Feet and legs (90 seconds). Start at your soles. Sweep upward with long strokes. Add gentle circles behind your knees.
➡️ Hips and buttocks (30 seconds). Keep brushing upward. Use medium pressure.
➡️ Stomach (30 seconds). Move in clockwise circles. Keep the pressure light.
➡️ Back (60 seconds). Use your long handle. Sweep upward toward your shoulders.
➡️ Chest and neck (30 seconds). Use feather-light strokes toward your heart. Stop at your jaw.
➡️ Arms and underarms (60 seconds). Start at your hands. Brush toward your armpits.
Total: 5 minutes.
🚿 Finish
Step into the shower. Rinse away the loose dead skin cells. Pat your skin dry. Then apply lotion or body oil while your skin is still damp.
⚡ Short on Time? Try the 2-Minute Express
Brush your legs for one minute. Brush your arms for one minute. Skip the rest. Add the other zones when you can.
💡 Make It a Habit
Keep your brush next to the shower. Brush at the same time each morning. A steady short routine beats an occasional long one.
⬛⬛⬛⬛⬛⬛⬛⬛⬛
💪 How Hard Should You Press?
Dry brushing should feel good. Think “wake-up call,” not “scrub-down.” The right pressure protects your skin barrier. 🌿
📊 The 1–10 Pressure Scale
| Level | How it feels | Where to use it |
| 1–3 | Feather-light to light. Bristles barely press in. | Chest, neck, stomach |
| 3–5 | Light to medium. Skin feels gently stimulated. | Back, arms, hips, legs |
| 5–6 | Medium-firm. The brush still glides. | Soles of the feet |
| 7–10 | Too hard. Skin drags or stings. | Never |
Stay at 6 or below.
🌸 The “Slightly Pink” Rule
Your skin may look slightly pink afterward. That is normal. It should never feel sore, hot, or scratched. The brush should glide, not drag.
🔁 The Overlap Rule
Use three to five overlapping strokes per area. Then move on. Lingering can cause irritation or even bleeding. More time does not mean better results.
🌱 Beginner vs. Regular Brushers
➜ Beginners: Start at the low end of each range. Build up slowly over several weeks.
➜ Regular brushers: Keep the same pressure. Do not go harder. Skin adapts, but harsher strokes only raise your risk of over-exfoliation.
Let comfort be your guide. Pain is a signal to ease off.
⬛⬛⬛⬛⬛⬛⬛⬛⬛
📅 How Often to Dry Brush
Advice varies a lot. One dermatologist suggests once a month. Others say daily is fine. Your skin makes the final call. 🌿
🤷 Why Does Advice Differ?
Skin types differ. Brush firmness differs too. A soft brush may suit frequent use. A firm brush on sensitive skin may not. Over-exfoliation is the main risk.
🧭 Which Schedule Fits You?
| Your skin | Start with | Build up to |
| Normal to dry, calm | 1–2 times a week | 2–4 times a week |
| Sensitive or hormone-prone | Once a week | 1–2 times a week |
| Eczema-prone or reactive | Ask your doctor first | Clear areas only |
🗓️ Your 4-Week Beginner Ramp
| Week | Sessions | Pressure | Time |
| 1 | 1–2 | Level 2–3 | 2–3 minutes |
| 2 | 2 | Level 3–4 | 3–4 minutes |
| 3 | 2–3 | Level 3–5 | 5 minutes |
| 4 | 3–4 | Level 3–5 | 5 minutes |
🌅 Morning or Evening?
Choose mornings. Brushing feels energizing, so it may keep you alert at night. Either way, brush before you shower.
✋ Signs to Cut Back
Lingering redness, tightness, or stinging means slow down. Skip a week. Then restart at Week 1.
⬛⬛⬛⬛⬛⬛⬛⬛⬛
🚿 After Brushing: Shower, Moisturize & Routine Order
What you do next matters as much as the brushing. Finish the job in two quick steps, then check the order chart. 🌿
🚿 Step 1: Shower Right Away
Rinse off the loose dead skin cells. Use lukewarm or cool water. Hot water can strip your skin’s natural oils.
🧴 Step 2: Moisturize While Damp
Pat dry, but leave your skin slightly damp. Apply lotion or body oil within minutes. This helps lock in moisture.
📋 Routine Order Chart
| Step | Where it fits |
| 🪥 Dry brushing | First, on dry skin |
| 🚿 Shower | Right after brushing |
| 🪒 Shaving | In the shower, after brushing |
| 🧴 Lotion or oil | Right after the shower |
| 🧪 Acids and retinoids | On non-brushing days |
| 🤎 Self-tanner | Brush the day before |
| 🌞 Sunscreen | Last, on exposed skin |
🚫 One Rule to Remember
Never pair dry brushing with chemical exfoliants in one session. Together, they can over-exfoliate your skin.
⬛⬛⬛⬛⬛⬛⬛⬛⬛
🎯 Dry Brushing for Your Skin Type & Situation
One routine does not fit every body. Adjust with this quick guide. 🌿
| Your situation | Adjust like this |
| Sensitive skin | Use a soft brush or dry washcloth. Stay light. |
| Dry skin | Brush less often. Moisturize right after. |
| Keratosis pilaris bumps | Stay gentle. Skip any inflamed bumps. |
| Dark skin | Keep pressure low. Irritation can leave dark marks. |
| Men and ingrown hairs | Use light strokes. Never brush over bumps. |
| Fresh shave | Wait a day. Let nicks heal first. |
| Acne-prone back | Skip active breakouts. Clean your brush often. |
| Mature, thinner skin | Choose a soft brush. Start at level 2. |
Not sure where you fit? Begin at Week 1 of the ramp. Have a skin condition? Ask your doctor first. 🩺
⬛⬛⬛⬛⬛⬛⬛⬛⬛
🛠️ Troubleshooting: Common Dry Brushing Problems
Something feels off? Most issues have simple fixes. Find yours below. 🌿
| Problem | Likely cause | Quick fix |
| 🔴 Lingering redness | Too much pressure or too many sessions | Skip a week. Restart at Week 1. |
| 😖 Itching | Dry skin or hot water | Use lukewarm water. Moisturize right away. |
| 🏜️ Tight, dry skin | Skipped aftercare | Apply lotion or oil while skin is damp. |
| 🔘 New breakouts | A dirty brush | Wash your brush. Skip active breakouts. |
| 🪒 Ingrown hairs | Heavy pressure or brushing right after shaving | Use lighter strokes. Wait a day after shaving. |
| 🩹 Scratches or bleeding | Lingering too long or bristles too stiff | Stop brushing. Let skin heal fully. |
| 🤔 “I see no results” | Rare brushing or big expectations | Brush steadily for three to four weeks. Expect smoother skin, nothing more. |
| 🪮 Brush feels off | Wrong firmness | Redo the inner-wrist test. Swap brushes if needed. |
🚩 When to See a Doctor
Stop brushing if you notice a rash, swelling, or pain. See your doctor if irritation lasts more than a few days. Never push through discomfort. Your skin barrier needs time to recover. 🩺
⬛⬛⬛⬛⬛⬛⬛⬛⬛
❌ Common Mistakes & Myths
Avoid these slip-ups. They cause most dry brushing problems. 🌿
🚫 Do This, Not That
| ❌ Don’t | ✅ Do |
| Brush wet skin | Brush dry skin before your shower |
| Press hard | Stay at level 6 or below |
| Linger on one spot | Use 3–5 overlapping strokes |
| Brush your face | Use products made for the face |
| Skip moisturizer | Apply lotion while skin is damp |
| Share your brush | Keep it personal and clean |
| Never clean your brush | Wash it weekly with mild soap |
| Ignore stinging | Stop and rest your skin |
| Pair it with acids | Keep them in separate sessions |
🧠 Myth Check
Some claims sound great. Few hold up.
⟢ “It detoxes your body.” No solid proof supports this. (Healthline)
⟢ “It erases cellulite.” No scientific evidence supports this. (Cleveland Clinic)
⟢ “More brushing means better results.” Overdoing it can irritate your skin.
⟢ “It opens your pores.” Brushing works on the surface only.
⟢ “It treats health conditions.” It is a skin care step, not a treatment.
Skip the myths. Keep your routine gentle, steady, and simple. Your skin will thank you. 💚
⬛⬛⬛⬛⬛⬛⬛⬛⬛
❓ People Also Ask
Q1: How often should you dry brush?
💬 Start with once or twice a week. If your skin stays calm, build up to two to four times a week. Sensitive skin needs less. Experts differ, and some say daily brushing is fine. Stop if you notice redness or stinging.
Q2: Should you dry brush before or after a shower?
💬 Brush before your shower. Brushing works best on dry skin. The shower then rinses away loose dead skin cells. Moisturize right after, while your skin is still slightly damp.
Q3: Which direction should you dry brush?
💬 Brush toward your heart. Start at your feet and sweep upward. Use small clockwise circles on your stomach. Keep strokes long on your limbs and light on your chest and neck.
Q4: Does dry brushing help with cellulite?
💬 No proof says it does. Cleveland Clinic’s dermatologist says any change is likely a brief plumping from blood flow. Dry brushing can leave skin smoother. It will not remove cellulite.
Q5: Can you dry brush your face?
💬 No. Facial skin is thinner and more delicate. A body brush is too rough. Use gentle products made for the face instead.
⬛⬛⬛⬛⬛⬛⬛⬛⬛
💚 Conclusion
Now you know how to dry brush your body the safe, simple way. Start small. Use light pressure and a natural bristle brush. Follow the body map, and keep your skin calm.
Expect smoother skin, not miracles. That is enough. Your skin works hard every day. Dry brushing is a kind way to thank it. A few gentle minutes can turn a rushed morning into an act of self-care. 🌿
Take it slow. Listen to your skin. Grab your brush, and begin with Week 1 today.

I am Eryndor Vale, a seasoned content writer who brings depth, clarity, and creativity to every piece of writing.
I specialize in crafting engaging, well-researched content that connects with readers and delivers real value.
Through my work at textzhub.com, I turn ideas into impactful stories that inform, inspire, and engage.